
The Basics
One of the axles on the RV was bent. We knew this. The bent axle was causing uneven wear on that axle’s tires. We couldn’t afford to replace them right away, so we were keeping a close eye on the tires before, during, and after every trip. We carried two spares with us.
Eventually, we purchased all the parts we would need to replace the axles (and wheels, tires, brakes, etc.) and planned to start the installation mid-November, after our last camping trip of the year. The RV had other plans.
An Unexpected Detour
Thursday afternoon, on our way to Pride RV Resort, our TPMS system went off. One of the RV tires was losing air quickly. We managed to pull off the highway and into a Love’s Truck Stop parking lot. We found the hole and tried to plug the tire. When we refilled the air, we heard the leak again. Since plugging the tire wouldn’t work, we took that tire off and put on one of the spares.
After a lovely weekend (if you want the details, read this post), the TPMS system went off again on the way home on Sunday! We were close to an exit and found a large parking lot. This time, it was a different tire, and it wasn’t a hole, more like a split along the tread. There was clearly no plugging that; the second spare went on.
About an hour later, we were driving on I-40 when Jesse noticed (from the TPMS system) that another tire (this time on the other side of the RV) was significantly hotter than the rest. The other tires were about 70 degrees, but the driver’s side rear RV tire was more than 100 degrees. Just as he noticed that, a car pulled alongside us and motioned that something was wrong. Jesse looked back in the mirror and saw flames!
He immediately pulled off on the shoulder. We grabbed a fire extinguisher from the RV and put out the small fire by spraying at the driver’s side rear tire from the passenger side (there was too much traffic and it was too close to safely put out the fire from the driver’s side). Because of the traffic, Jesse couldn’t get a good look at the problem. We drove about a mile to exit 168 and pulled off in the Pure Gas parking lot.
These next few steps are kind of a blur. We were too stressed to stop and take photos, and my memory of the events I’m sure is a little mixed up, but I’ll do my best.
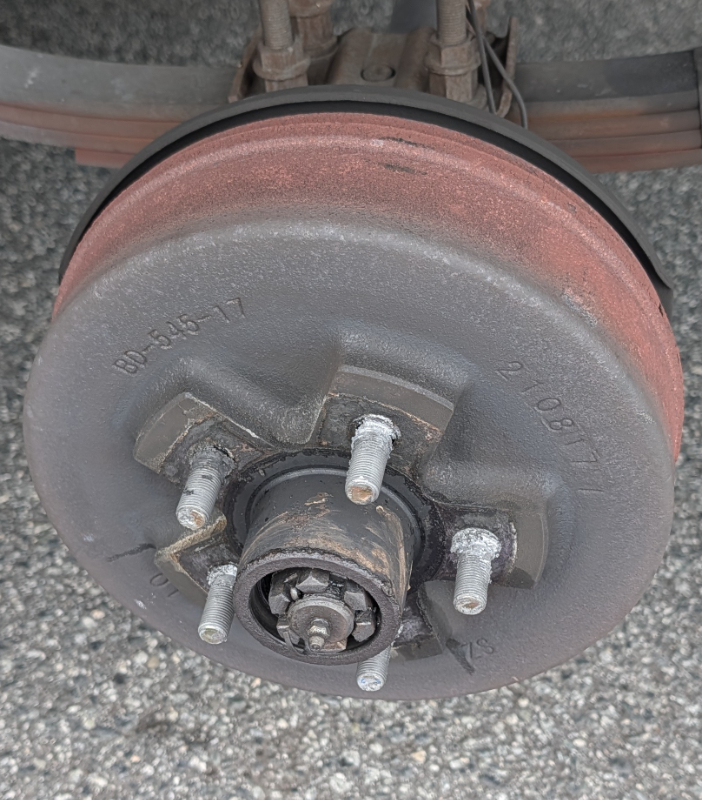
We jacked up the RV to get the driver’s side rear wheel off the ground. After we removed the tire, Jesse could tell the issue had something to do with the hub and bearings. Unfortunately, that meant there was no way we could drive the RV the rest of the way home (more than 2 hours from that spot).
In this image, you can see the bearing is off-center (that’s a problem). The part around the outside is red because of how hot it was. The whole thing should be the color of the center area.
We started thinking about options.
- Getting it towed wouldn’t work because no one would put something as large as our RV on a flat truck. They’d tow it just like we do, but it was the spinning of the wheels/tires that was causing everything to overheat.
- We found a campground close to the exit. Most campgrounds don’t allow you to work on your truck/RV, but we thought if they’d make an exception, maybe we could get a campsite, leave the RV for the week, and come back on the weekend with all of the parts to change the axle there. We called the campground only to learn that the office is closed on Sundays.
- Trailers of the East Coast is a huge trailer dealership only 3.2 miles away from where we stopped. We thought they might let us leave the trailer there for a week, but it turns out they’re also closed on Sundays.
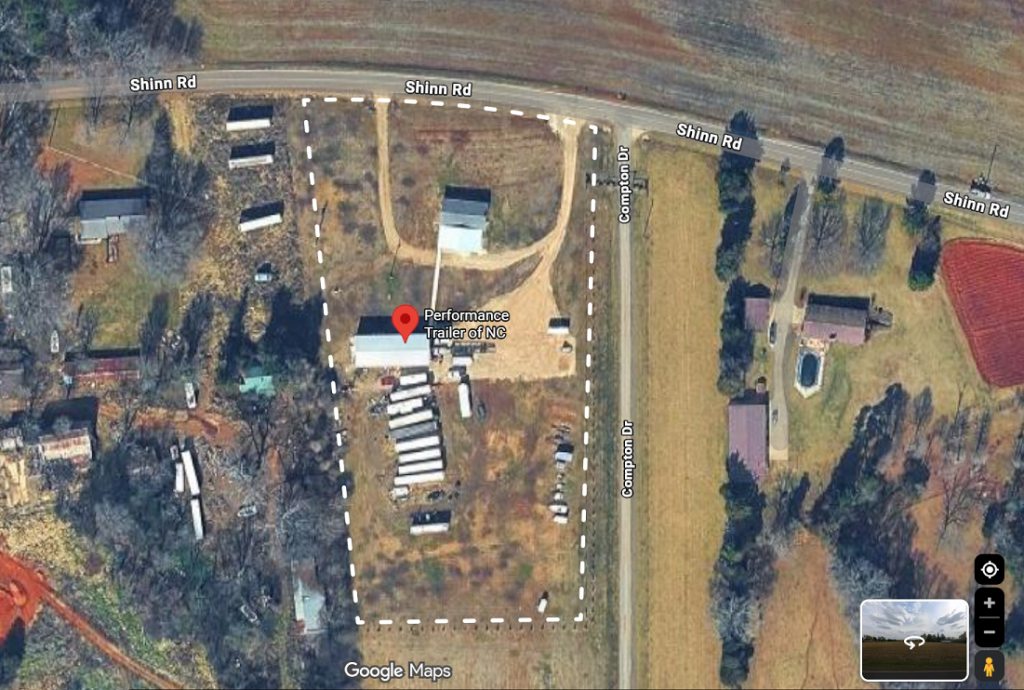
Eventually, Jesse found Performance Trailer of NC, which, according to Google, is open 24 hours a day. We called and left a message, and he called back in less than 10 minutes. He gave us a few tips so we could limp the trailer to his shop, which was more than 21 miles away via back roads, and said if we could get there, he could help. After getting off the phone, we removed the tire, secured the axle so it wouldn’t hit anything along the way, and set off to the shop.
It took us almost an hour, but we made it. The shop sits on a large piece of land on a residential road. It was open and quiet. The owner doesn’t have pets, so it was a perfect place to get the dogs out after hours of driving. Below is a screenshot from Google Maps of the property. We put Aiken on a 20-foot leash and were able to play fetch with him in the open space toward the back of the property.
Once the owner finished with the vehicle he was working on when we arrived, Jesse backed the RV into the shop. The owner and an employee started taking things apart. The area had gotten so hot that some of the pieces had actually welded themselves together! They had a heck of a time getting everything off, but eventually were able to put on a new hub.
While we were there, we got to talking about our plans to replace the axles. The owner gave Jesse several tips about the project. He also showed him a few tools we didn’t know about. (We ended up ordering one on Amazon.) He charged $500. Given that this was an unscheduled repair on a Sunday and included parts and labor, Jesse thinks this was a reasonable price. Overall, we feel very lucky to have found Performance Trailer of NC.
Thanks to those repairs, we made it home. In the end, what should have been a 5-hour trip took us 10 hours.
Tackling the Bigger Problem
We will probably never know if the tire problems and/or the wheel/bearing failure on that trip were caused by the axle issue, but we knew we weren’t going anywhere else until we replaced the axles. We cancelled the last two trips we had planned for the year and started the most intense RV upgrade we’ve made since we purchased it.
First, we got the entire RV up on jack stands so the tires were off the ground. Then we got both axles on jack stands. We removed the wheels and tires.
Next, we removed the hub assembly (to take some weight off the old axles and make them easier to move. We removed the bolts to disconnect the axles from the rest of the trailer.
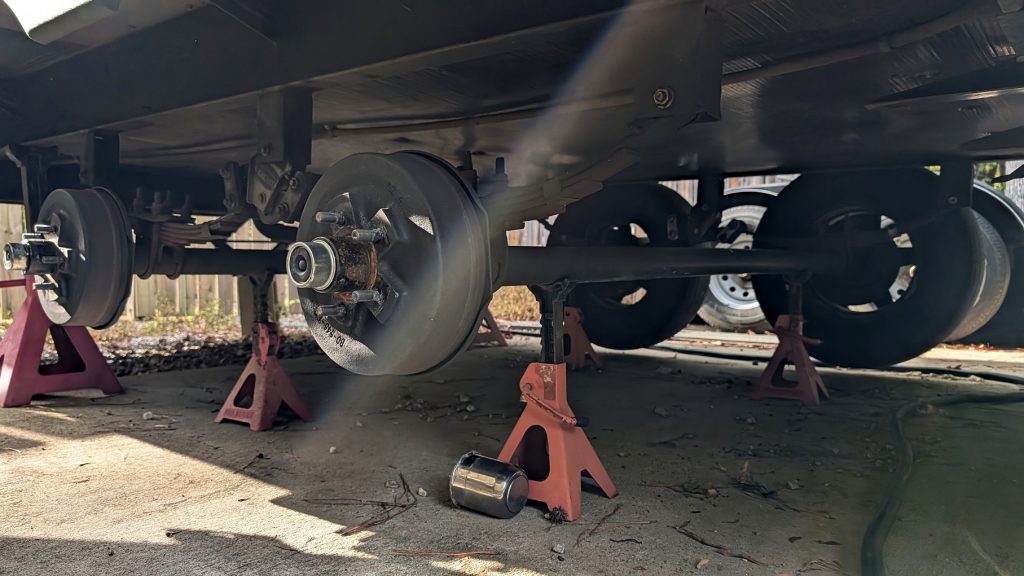
Then we brought in the new axles and bolted them to the [frame]. Here is a photo of the new hub assembly.

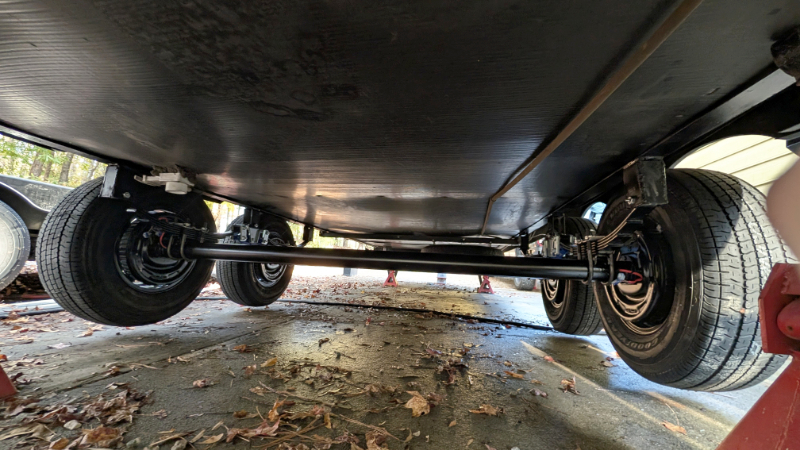
Here is a photo of the underside of the RV with the new axles in place and tires mounted.
Finally, we removed the jack stands first from the axles and then the rest of the RV.
In the end, we upgraded the axles, brakes, and wheels. The table below compares some of the specs of the old parts to the new parts.
| Previous | New | |
| Axles | 2 3/8″ diamter 3500 lbs each | 3″ diameter 5200 lbs each |
| Brakes | 10 x 2.25″ 3500 lb per axle | 12 x 2″ 7000 lb per axle |
| Wheels | 5 lug | 6 lug |
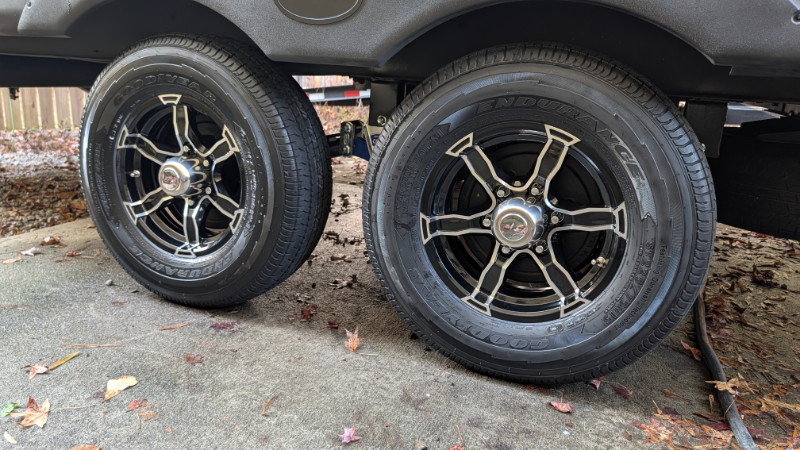
Here is a photo of the shiny new wheels and tires.
We cannot wait to get back on the road in the spring! Our first trip will be to Raven Rock State Park in February.
Happy travels!